
Learn how to use the HAL Robotics Framework.
• documentation home• decode
• Grasshopper SDK
• back to main site
• issues and bugs
Universal Robots
0. Tips
- We do not currently have a means to reference TCPs and Payloads from your current Installation so make sure these are accurately defined in your simulation.
- You can switch between Process Move (movep) and normal (movel) for linear motion in the Controller configurator.
- Signals are identified by their indices so either name your signals with an index, e.g. 2, or use the export overrides to ensure the correct index is exported.
1. Controller Options
Objective:
In this section we’ll explain which Subsystems are available in the HAL Robotics Framework for Universal Robots and that their Capabilities are. These will be used when you Configure a Virtual Controller.
Background:
Industrial Controllers are typically comprised of core functionality, such as the ability to run a program, extended through optional extras, like communication protocols or multi-Robot support. To ensure that we only try and interact with your real Controller in a way that is compatible, be it through a network or with exported code, we have added a means to configure your Controller. The constituent parts of this are:
a. Controller - this is essentially a computer to which your Robot and Signals are connected.
b. Capabilities - these are how we organize what a Controller can do and draw parallels between different manufacturers’ Controllers. Capabilities are things like the ability to Upload code to the Controller from a PC or the ability to read the values of Signals remotely.
c. Subsystems - these are similar to the options you have in your Controller. They are the actual software modules that implement different Capabilities.
Details:
You’ll find two different Universal Robots controllers in our catalogs, CB3 (for UR3, UR5 and UR10 robots) and e-Series CB5 (for UR3e, UR5e, UR10e, UR16e and UR20 robots). There are minor compatibility differences between them but your interactions with them through the HAL Robotics Framework will be identical.
| Subsystem Name | Description | Capabilities | Configuration |
|---|---|---|---|
| URScript X.X | Translates Procedures to URScript. | Language | > Enabled - Whether to export the procedure. > Library Mode - Whether to export code that will run directly or that can be called from another function. > Use Process Move - Whether to use Process Move (movep) for linear motion. Otherwise normal (movel) is used. |
| Dashboard X.X | Controller administration interface. | Upload Execution Backup |
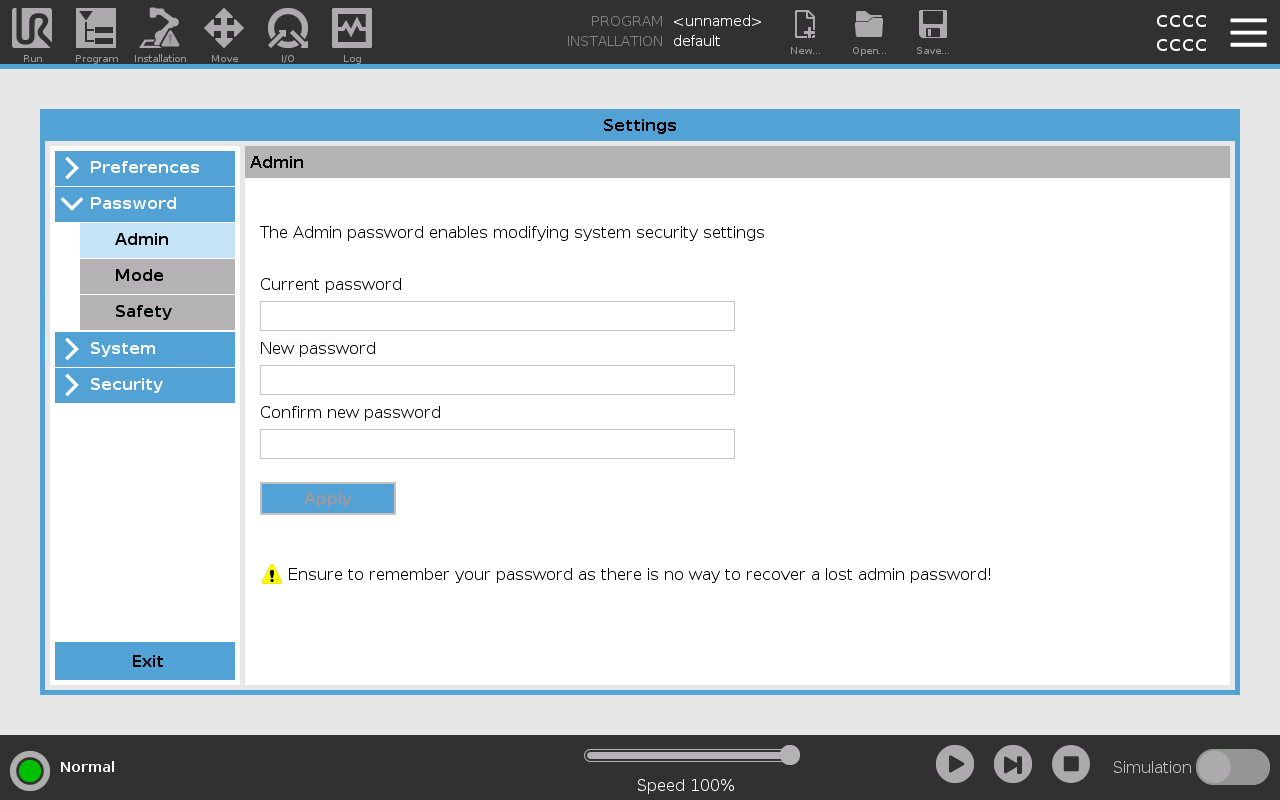
> IP - IP address of your remote robot or simulator. > Credentials - Credentials needed to log in to the robot (or simulator) remotely. Defaults will work unless they have been changed in your robot’s Settings -> Password -> Admin window. > Root Directory - Directory in which your programs, URCaps etc. are stored. Defaults to ‘/root’ but could be blank if your simulator is set up as below or ‘/ursim’ if using the default Docker image. |
| RTDE | Real-Time Data Exchange protocol which allows low latency communication and state streaming from the controller. | Monitor Receive State Read Signals Write Signals |
> IP - IP address of your remote robot or simulator. |
| Remote Files | Copies files to and from a remote controller. | File Manager | > IP - IP address of your remote robot or simulator. > Credentials - Credentials needed to log in to the robot (or simulator) remotely. Defaults will work unless they have been changed in your robot’s Settings -> Password -> Admin window. For a simulator, these should be the user on the host machine. |
| Local Files | Copies files to and from a Docker simulated controller. See Simulation below for more details. | File Manager | > Root Directory - Path to which the Docker programs path is set. See Simulation below and the Docker Hub page for the image for more details. |
2. Uploading Code
Objective:
In this section we’ll explain how to get the Procedures you’ve generated onto your robot. There are two different ways to do this, either manually or remotely.
Remote:
If this is the first time you’re setting up this particular robot controller for remote upload, skip down to the remote upload prerequisites and then come back here.
- Ensure your controller is configured to communicate with your controller. See Controller Options and Configure a Virtual Controller for more details about what your options are.
- Follow the instructions in Upload a Procedure.
- That’s all!
Remote Upload Prerequisites:
There are a few settings that need to be checked on your controller before we can connect to it from your PC. Some of these might already be correctly set on your system, but even if they aren’t these will only ever need to be done once on your controller. It is also good practice to restart the controller once everything below is configured to ensure it’s taken into account, the only exception is the activation of Remote Control which is likely to be toggled frequently and does not require a restart.
-
Ensure you have access to the admin password for you controller. You will need this to make many of the changes below, and it will be needed when you configure your Controller Options.
-
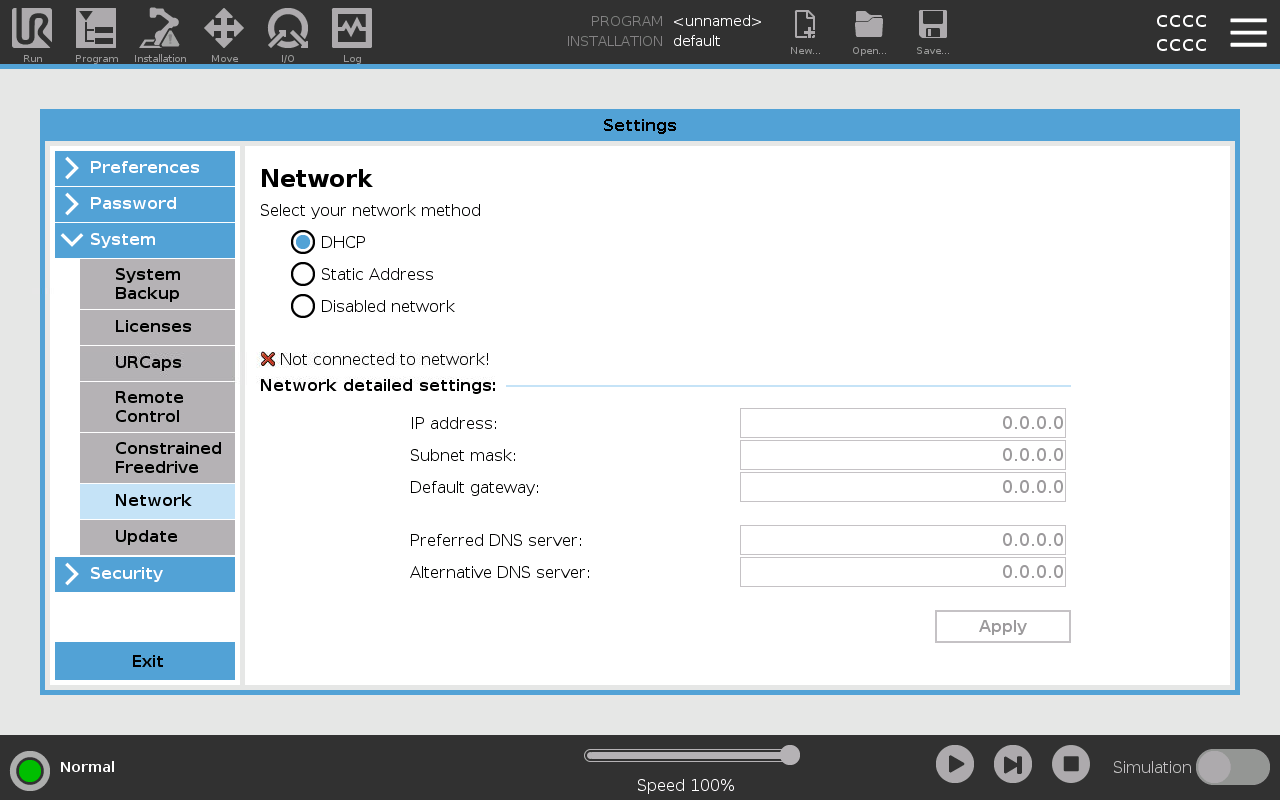
Enable the Network. DHCP or Static will work as long as your PC can be on the same subnet as the controller. Make a note of the IP address as it will be needed when you configure your Controller Options.
-
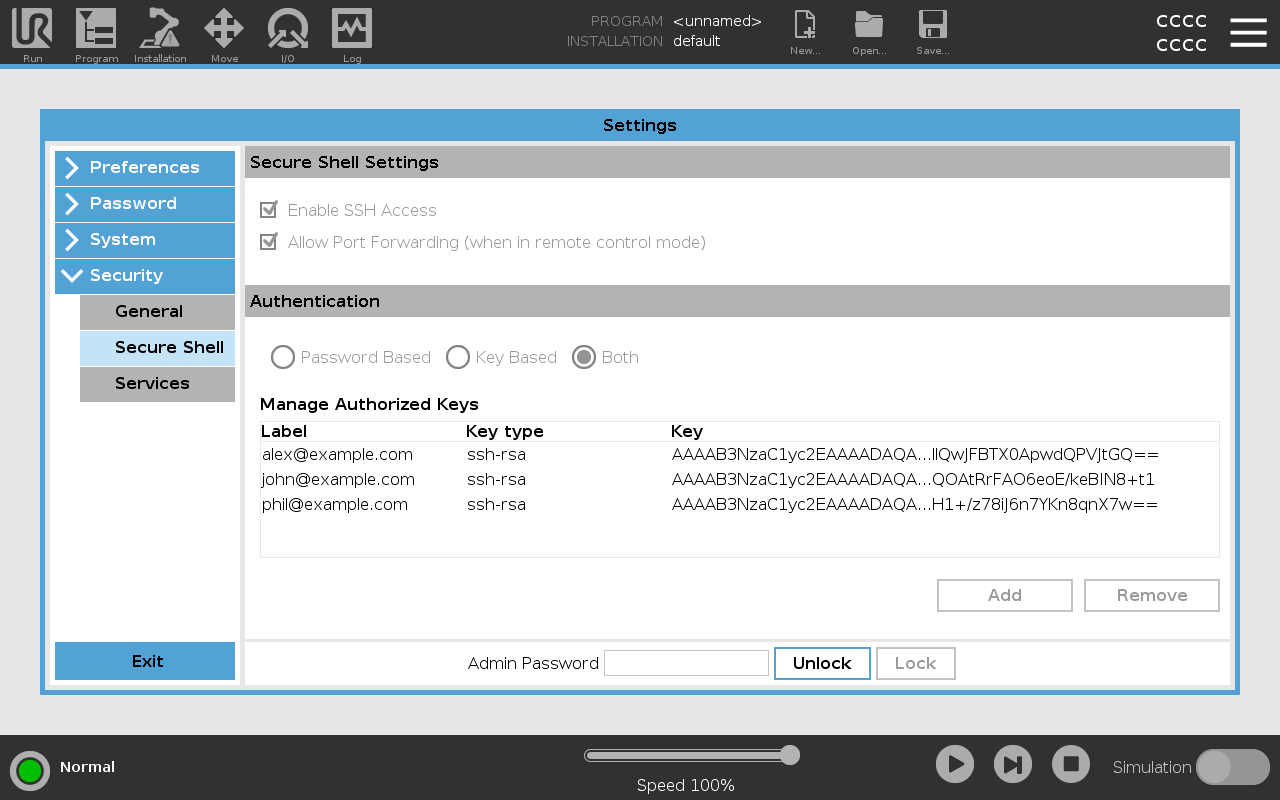
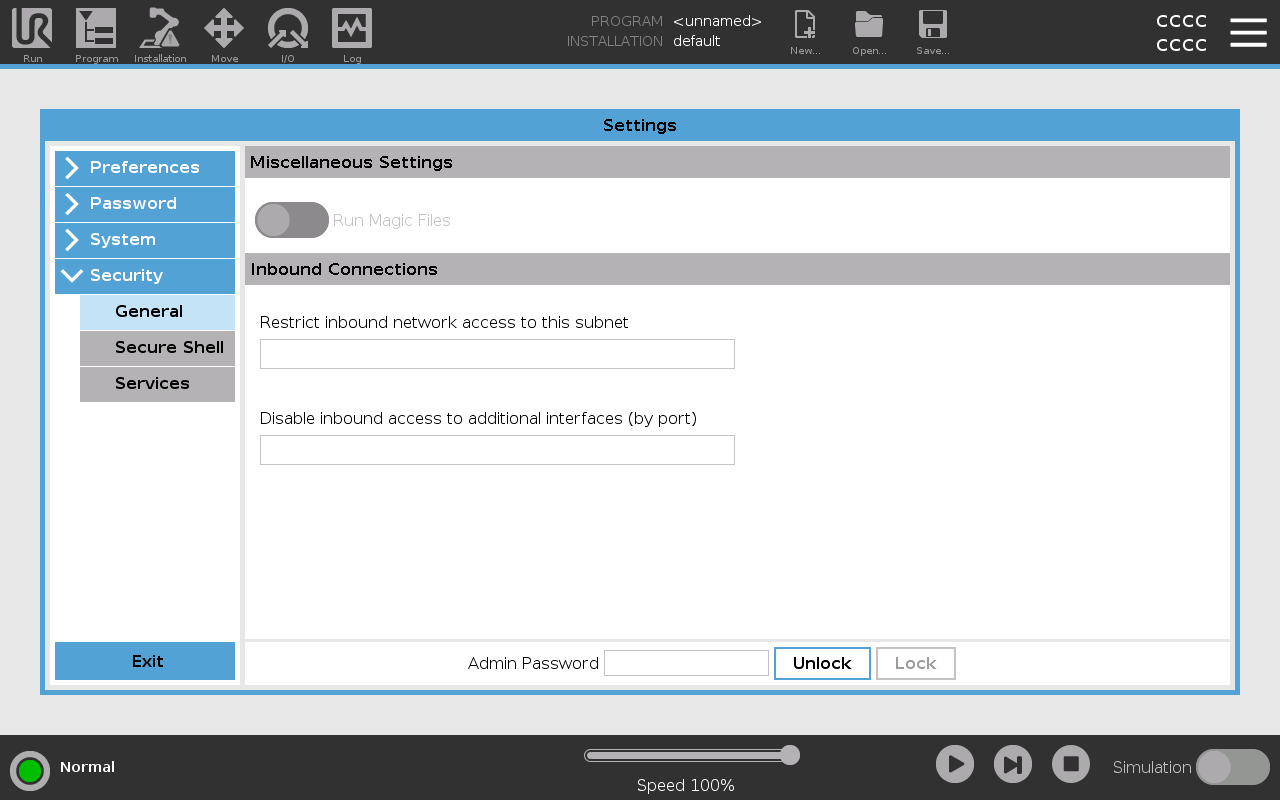
Enable the Secure Shell (SSH). This will allow us to transfer code files from a PC to your controller remotely.
-
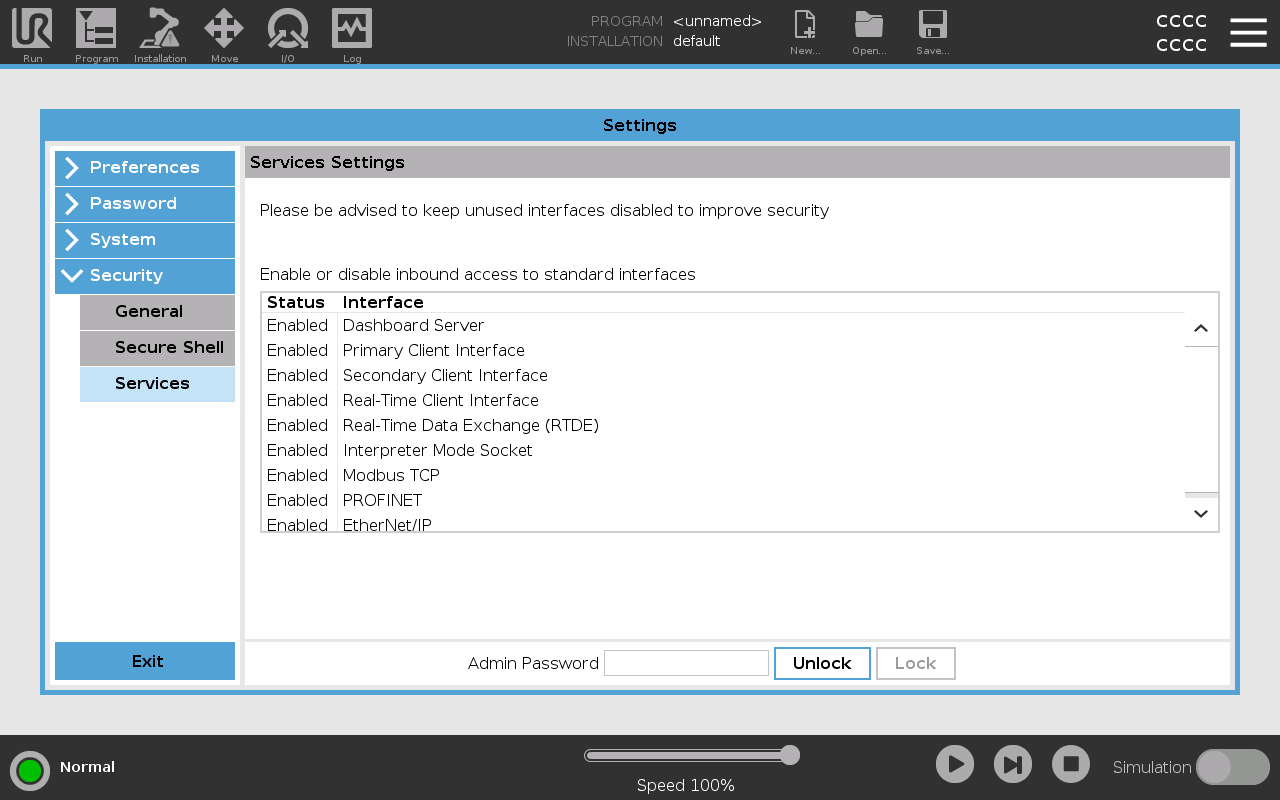
Enable the Services chosen in your Controller Options. Typically this will include Dashboard Server, RTDE and the Primary Client Interface.
-
Ensure inbound access for the following ports isn’t disabled - 22 (for SSH), 29999 (for Dashboard Server), 30004 (for RTDE) and 30001 (for Primary Client Interface). If there are other services you have enabled, the full list of used ports can be found here.
-
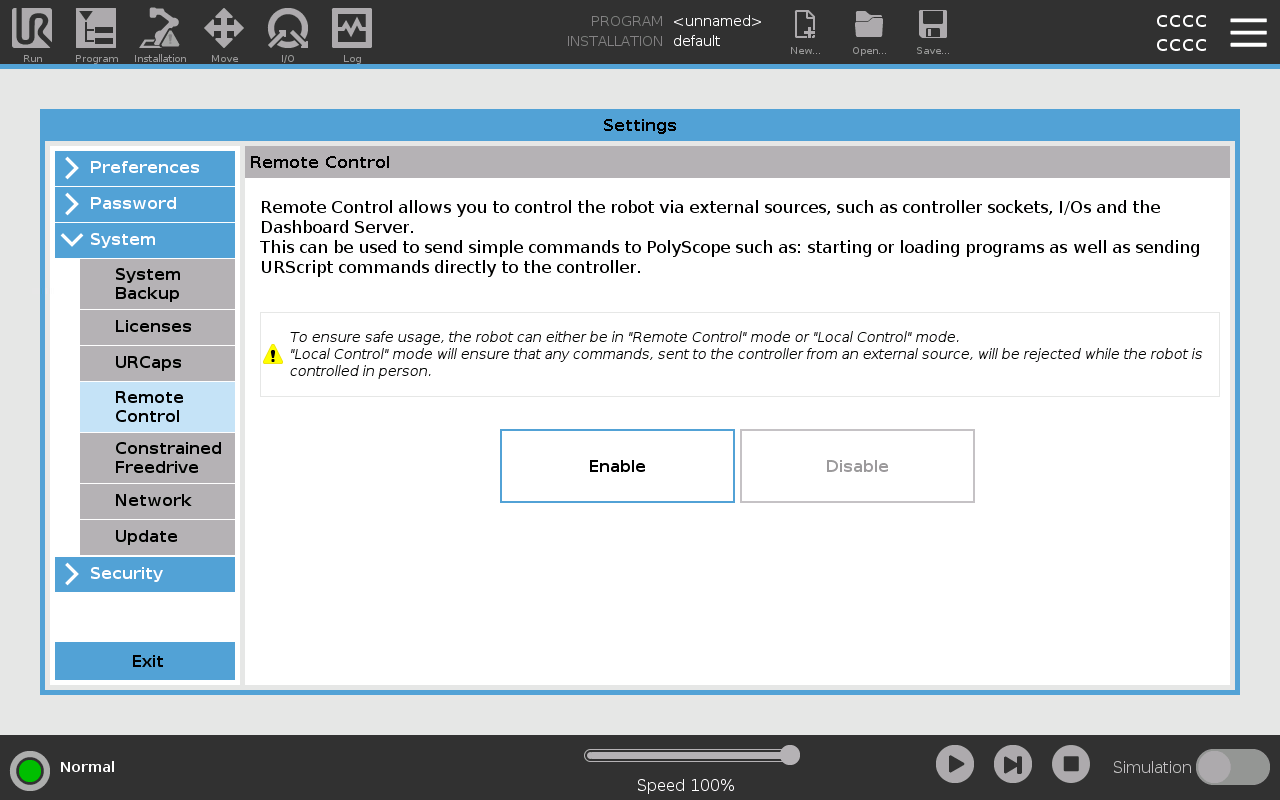
Enable Remote Control. This will add a nwe option in the top right corner of the screen which will allow us to command the controller from a PC using the various Services we just set up.
-
Activate Remote Control. This will allow us to command the controller from a PC using the various Services we just set up. It can be toggled in the top right corner of you teach pendant screen. In Remote Control you won’t be able to jog the robot or make manual changes so you are likely to toggle this on and off a few times whilst setting up your application but remember to activate it before attempting to upload code remotely.


Manual:
- Export your Procedure to a known directory.
- Copy the {ProcedureName}.script file onto a USB stick.
- Insert the USB stick into the USB port on the teach pendant.
-
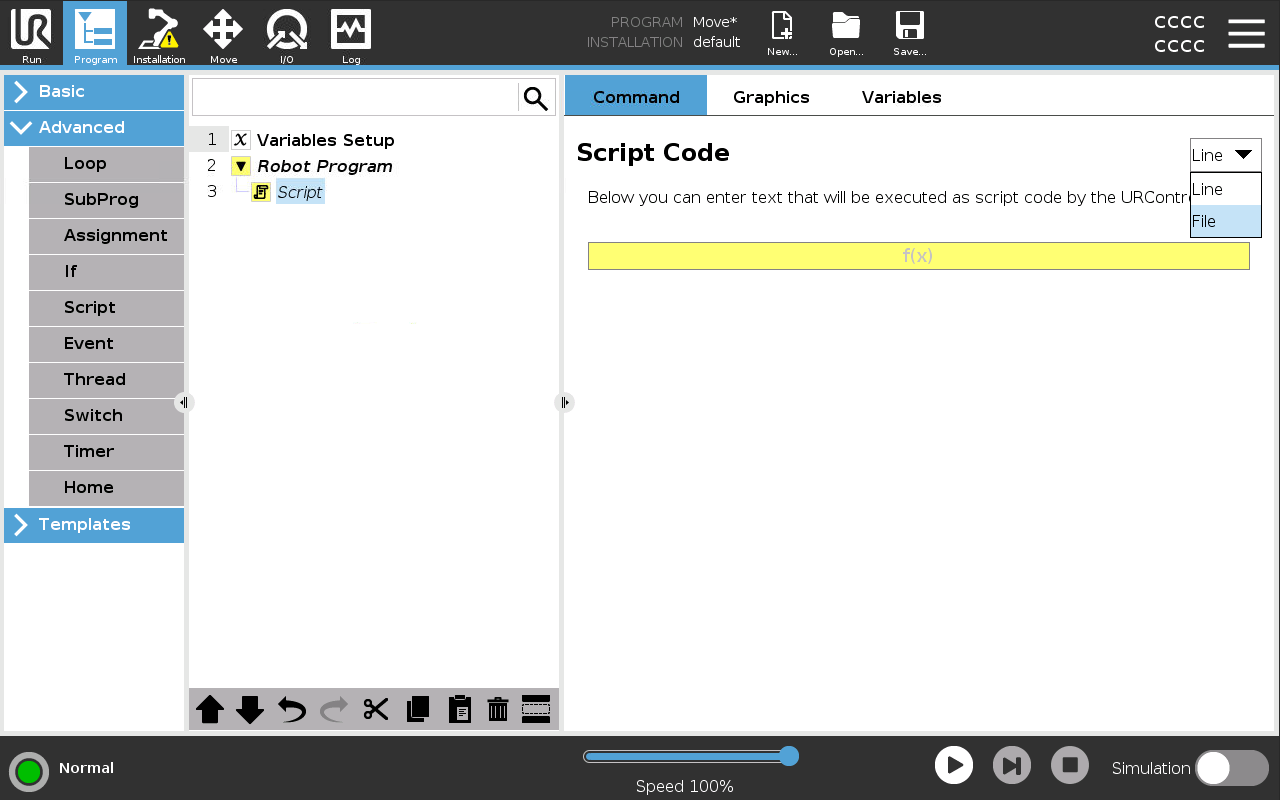
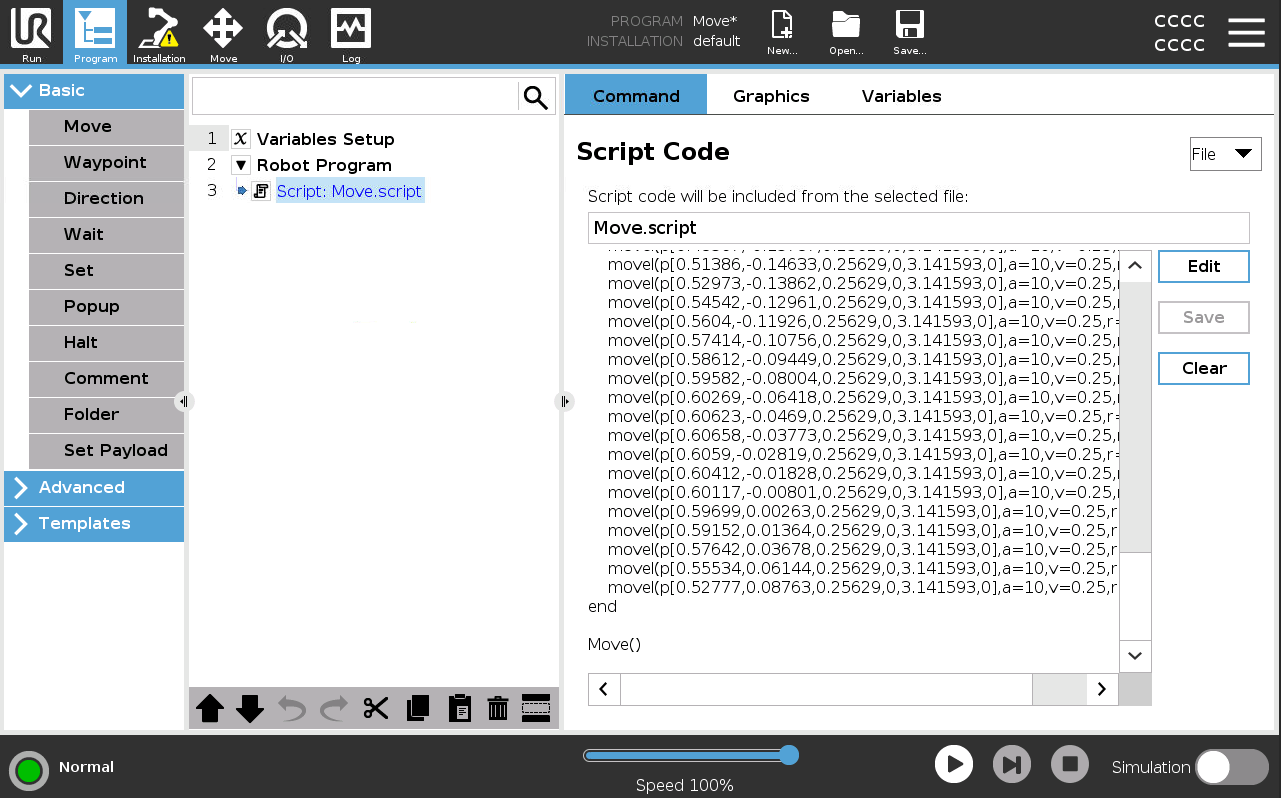
Create a new Program on the controller with a Script node (you’ll find this under the Advanced category) and set the mode to File.
-
Click Edit then Open to browse to your {ProcedureName}.script file on the USB stick. You can then Exit the script editor.
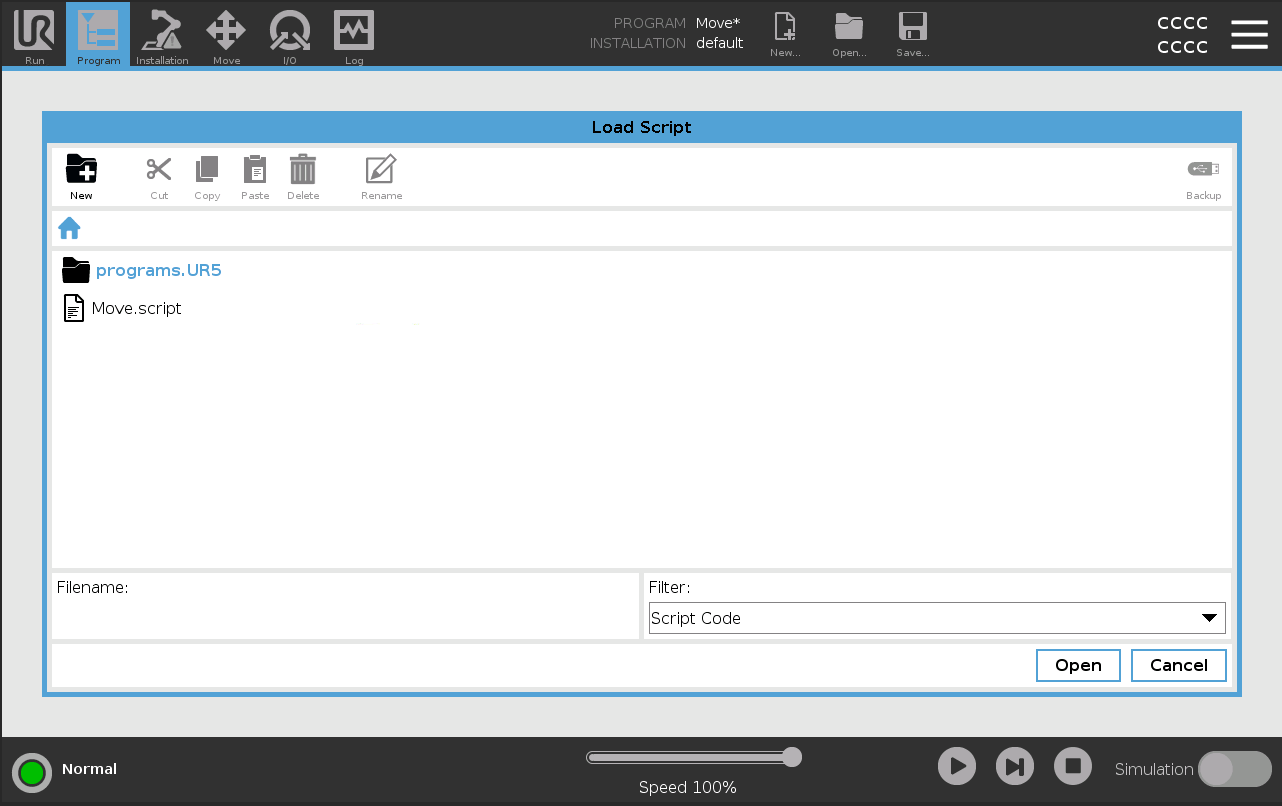
- Your {ProcedureName}.script is now loaded and ready to run.


3. Simulation
Objective:
Whilst we expect most users to use our own simulation tools for the majority of their cases, there may be a reason (e.g. cycle time analysis, or validation of the robot’s limits) that you want to run your Procedures on a manufacturer-provided simulator. This section details what you’ll need and how to configure that simulator.
Requirements to follow along:
- Linux Mint 17.1 computer or virtual machine, or Docker (in Linux container mode if on a Windows PC).
How to:
Docker
The easiest way to run URSim on a Windows PC or Linux is via Docker for which there is a Docker image here although this is (at the time of writing) still listed as experimental. To enable remote upload you will need to ensure that the Dashboard port (29999) is exposed in your container. This is mentioned on the Docker Hub page for the image. You will also need to ensure that your File Manager is set to Local, its path is set correctly and the Remote Root Directory in your Dashboard matches your Docker bind mounts e.g. /root if you bind mount points to /root/programs or /ursim if following the Docker examples.
E.g. docker run --rm -it -p 5900:5900 -p 6080:6080 -p 29999:29999 -v "/c/UniversalRobots/staging/root/programs:/root/programs" -e ROBOT_MODEL=UR5 universalrobots/ursim_e-series
In the example below, -p 29999:29999 is used to enable the Dashboard from your PC and the -v ... contains the full path /root/programs on the left hand side.
Linux
For CB Series Robots UR3-UR10 - Download the latest version of URSim 3.x from here. Installation instructions are included on the page.
For eSeries Robots UR3e-UR16e and UR20 - Download the latest version of URSim 5.x from here. Installation instructions are included on the page.
To enable uploading from the HAL Robotics Framework to URSim you will need to modify the start-ursim.sh file in the URSim installation directory. This will need to be done for each installation of URSim you have on the machine.
- Identify the code block starting with
#program directory - Within this block there should be a line similar to
ln -s $URSIM_ROOT/programs.$ROBOT_TYPE $URSIM_ROOT/programs - Comment this line by prefixing a
# - Add a new line just below containing
ln -s /programs $URSIM_ROOT/programs
Should end up with something like:
...

#program directory
rm -f $URSIM_ROOT/programs
#ln -s $URSIM_ROOT/programs.$ROBOT_TYPE $URSIM_ROOT/programs
ln -s /programs $URSIM_ROOT/programs

...