
Learn how to use the HAL Robotics Framework.
• documentation home• decode
• Grasshopper SDK
• back to main site
• issues and bugs
5. Advanced Programming
5.2. Procedures from Variables
5.1. External Variables
Coming Soon
5.2. Procedures from Variables
Coming Soon
5.3. Geometry from Variables
Coming Soon
5.4. Reuse Controller Data
Objective:
In this tutorial we’ll explore some advanced syntax which allows you to reference data and variables which are already declared on your Controller or rename variables you Export using the HAL Robotics Framework.
Background:
When your Robot and, more importantly, its Controller were installed, it’s possible that certain Tools were calibrated and stored in the Controller’s system variables or that it would be helpful to name Signals so they’re immediately identifiable (e.g. ToolOn) but that they’re named differently in your Controller or even that your Robot’s language doesn’t allow you to name Signals at all. We have therefore given you the option of overriding the way elements are Exported. These are generally useful for Tools, References and Signals but can be used for Targets, Motion Settings or any other declarable type.
How to:
These overrides are all done through the naming of objects, by using special syntax in their Aliases, activated or deactivated using the Translation Overrides Step. There are 3 scenarios we permit:
- Forcing the declaration of the element, even in
Inlinemode, e.g. so you can make manual changes to the code later. - Skipping the declaration of the element, e.g. because it’s already in the Controller’s system variables and you want to use that data directly.
- Renaming the element, e.g. the Signal which you have called ToolOn for legibility is actually called DO-04 or is index 3 on the real Controller.
- [Bonus] A combination of the above.
Overriding can be activated in the Translation Overrides Step of compatible items by toggling Override on. You will then see a few options appear. Mode can be set between Alias and Index. The former will allow you to specify a new name for the item when it’s exported. If the Alias Override is left blank, we will reuse the Name specified in the object itself. In Index mode, we will try to Export the Index within an array in the native language e.g. Tool[3]. If Skip Declaration is activated, then we will not Export any values for the item and assume that it is defined in your Controller’s system variables.
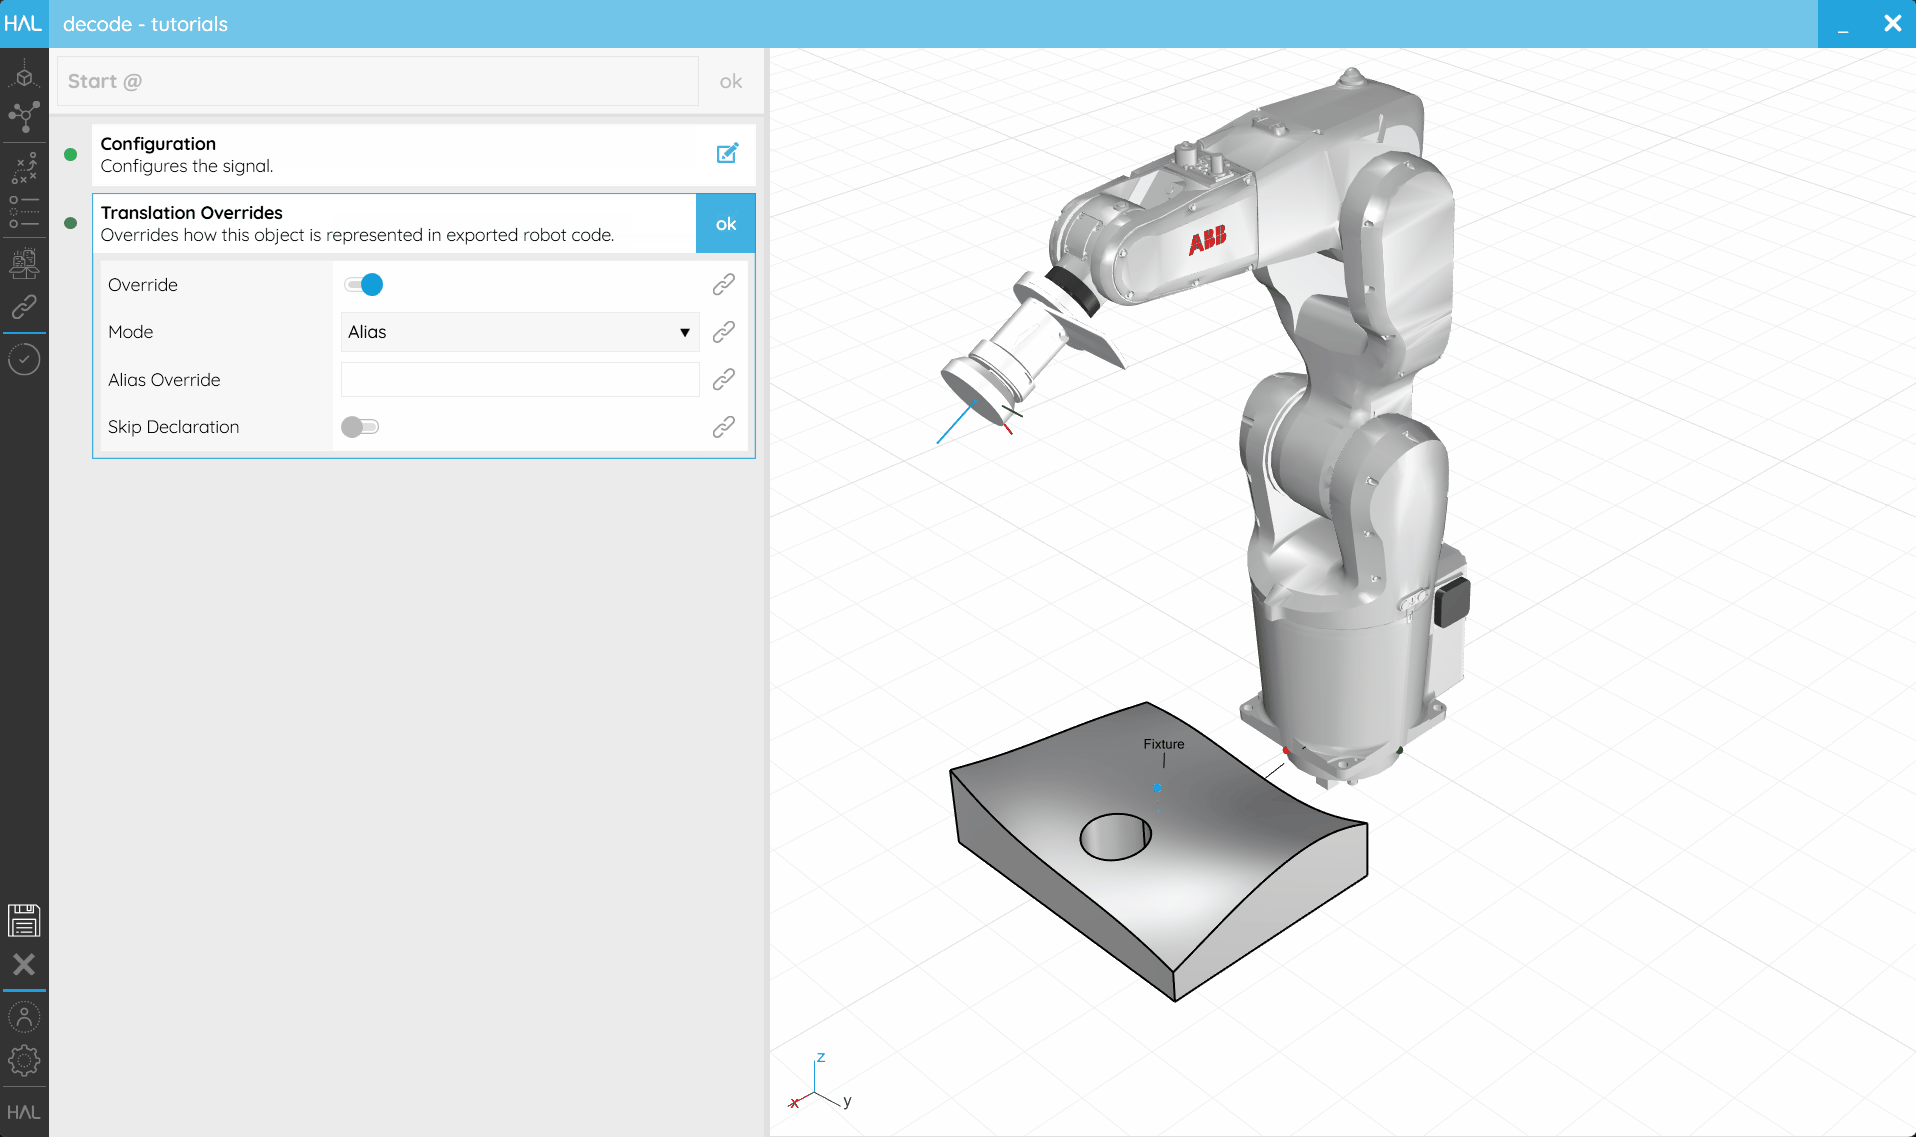 Translation overrides give you extra control over how items are exported to your robot code.
The syntax you will see is as follows:
- Declare an override - Appends
@to the Alias - Skip declaration - Appends
!to the Alias - Renaming - Appends the new name to the Alias
Examples:
| Code | Description |
|---|---|
MyTool |
Regular tool declaration. |
MyTool@ |
Forces the declaration of the tool. |
MyTool@toolData32 |
Forces the declaration of the tool, as a tool variable called toolData32. |
MyTool@! |
No declaration – considers that a “MyTool” tool declaration already exists in the controller. |
MyTool@!toolData32 |
No declaration – use the toolData32 tool variable from the controller. |