
Learn how to use the HAL Robotics Framework.
• documentation home• decode
• Grasshopper SDK
• back to main site
• issues and bugs
Custom Extensions
0.1. Setup
Objective:
In this tutorial we will introduce the components and structure of custom extensions for HAL Robotics Framework.
Requirements to follow along:
- Internet access.
Background:
The HAL Robotics Framework has been designed as modules to ensure that any unique or specific functionality can be added with relative ease. If you have already installed the software you will have seen a list of some of those modules on the right-hand side of the installer, most of which add functionality, and compatibility, for specific robot OEMs.
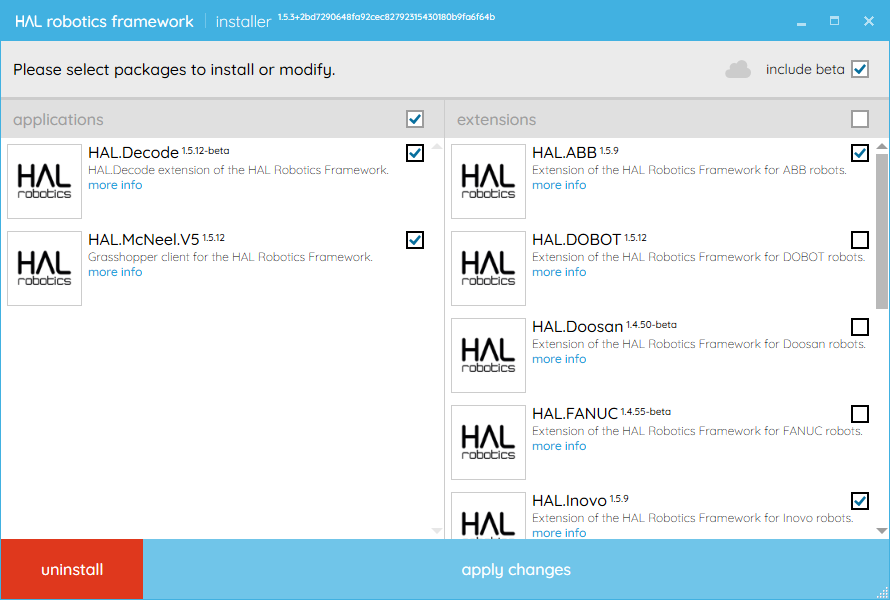 The HAL Robotics Framework is composed of functionality modules. The installer lets you select the ones you wish to install.
There are a few different types of modules that we create:
- Extensions - these are the modules you’ll see in the installer which contain compiled code and add logic and functionality to the Framework.
- Mechanisms - these include robots, positioners, tools etc. which have a physical and, potentially, kinematic structure
- Controllers - these are the control boxes for robots and are typically reliant on the correct Extension being installed e.g. HAL.ABB needs to be installed to load an ABB Controller.
- Parts - these are static physical elements that can be used to populate your Cell
All of the above are distributed as NuGet packages, .nupkg files and have structured names which include their version numbers. There are three parts to the naming structure:
- The Name - a series of dot-separated characters that are normally human readable e.g. HAL.McNeel
- The Version - Three dot-separated numbers indicating the version e.g. 1.5.12, which represent the Major Version (1), the Minor Version (5) and the Patch Version (12). This may also optionally have a pre-release suffix preceded by a hyphen e.g. -beta, which indicates that this is still an unfinished module.
- The Extension - .nupkg
A typical Extension will be named for the functionality that it adds e.g. support for a brand of robot, or a communication protocol whilst Mechanisms, Controllers and Parts (collectively Catalogue Items as they are listed in catalogues within the Framework) will have Globally Unique Identifiers (GUIDs) as their names. The latter is admittedly less easy to read but allows us to rename the contents if necessary without breaking the versioning of a particular module.
Extensions may come in multiple parts, more often than not, a “core” module e.g. HAL.RobotBrand, a UI module e.g. HAL.UI.[WPF.]RobotBrand and a grouping module that shows up in the installer and ensures all of the others are installed e.g. HAL.RobotBrand.ExtensionGroup.
How to:
Start by creating two directories somewhere on your PC in which you will store your Extensions and Catalogue Items. It is best practice to store Extensions and Catalogue Items separately as they need to be installed in different ways.
Extensions
To set up your Extensions, open the Installer and select the manage repositories, cloud-shaped button in the top right corner.

From the repository manager, give your repository an alias and put the path to the directory as the URI, then click add.
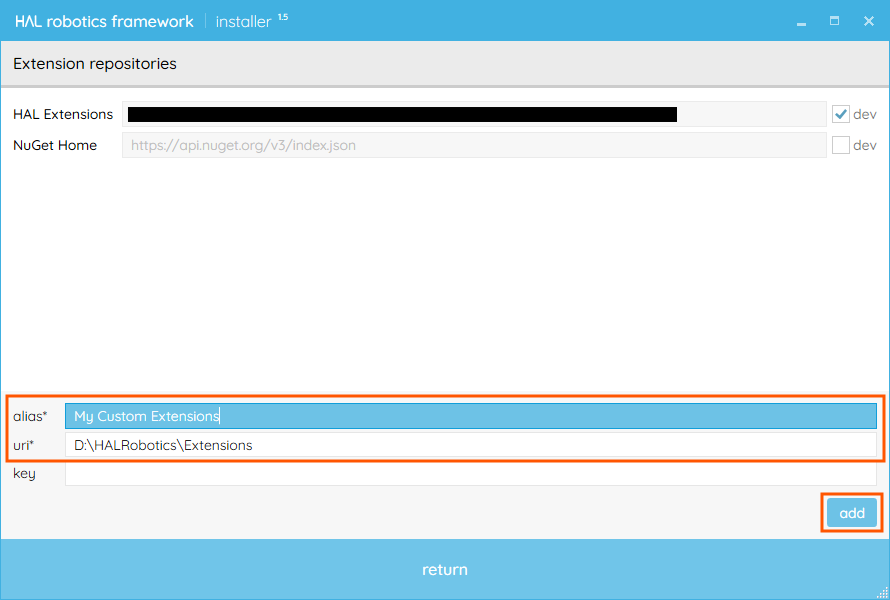
You will then need to restart the installer for your changes to be taken into account.
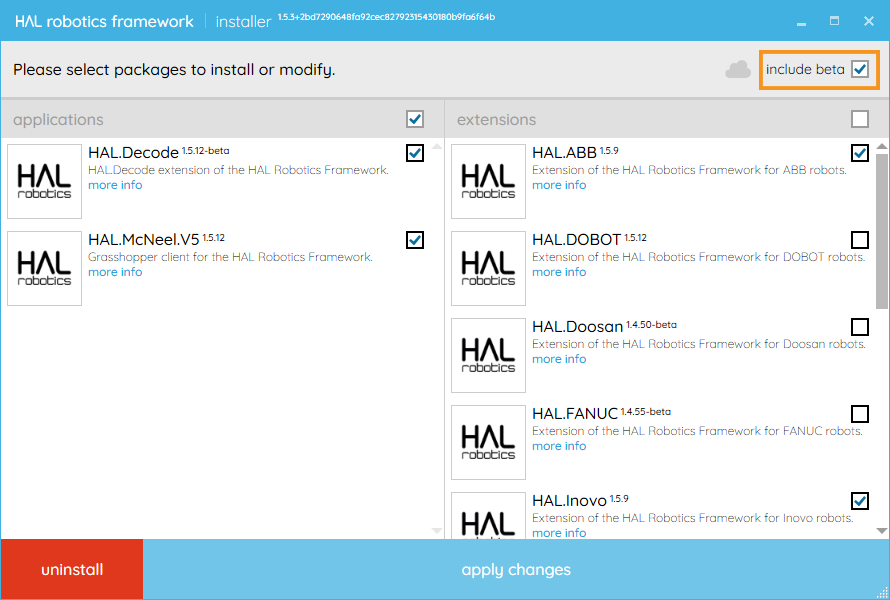
If you can’t find an extension you’re expecting to see it’s possible that it’s a pre-release version, in which case ensure the include beta box is ticked in the installer, as shown below.
Catalogue Items
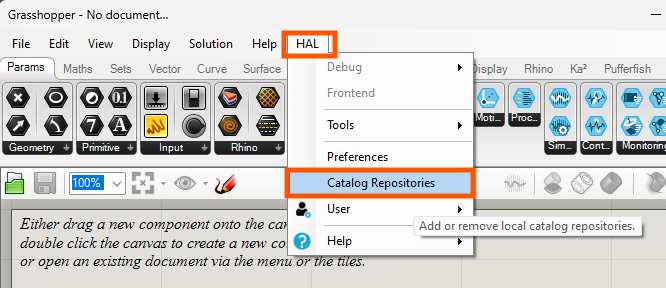
To set up your Catalogue Items, open Rhino3D and Grasshopper, navigate to the HAL menu and select the catalog repositories option.
From the repository manager, give your repository an alias and put the path to the directory as the URI, then click add.
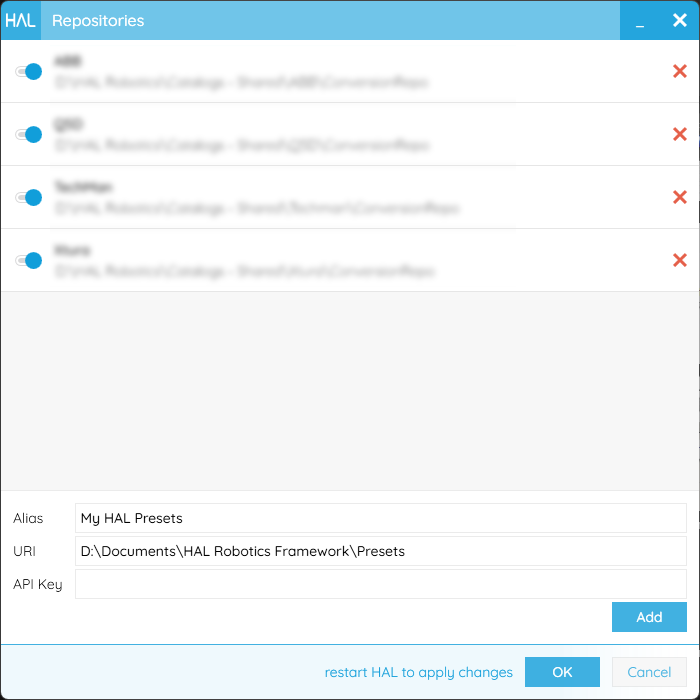
You will then need to restart the Framework for your changes to be taken into account. When you reload the Framework you will need to look for the Scan Online Content button in lower left-hand corner of your catalogue window to list any items you haven’t yet used.
Continue to: 1. Getting Started for decode or the Grasshopper SDK